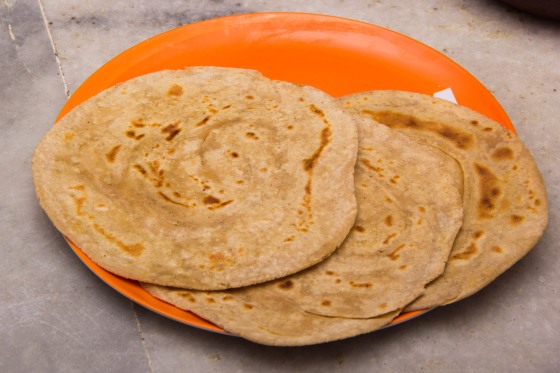
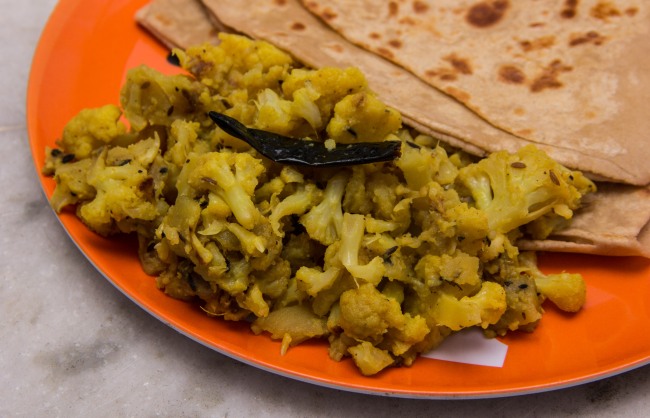
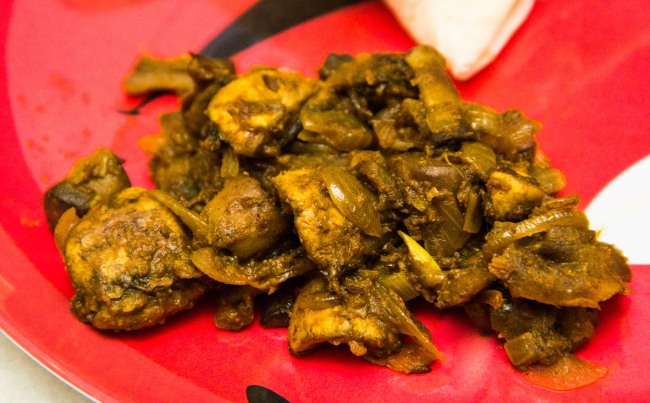
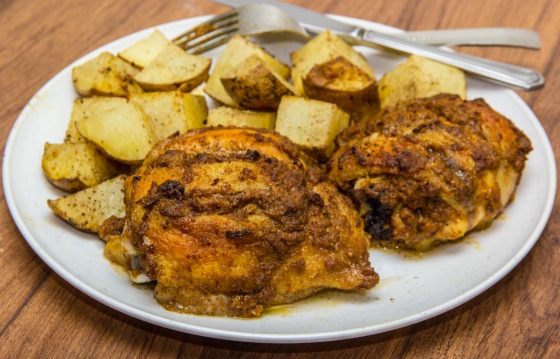
Desi Style Spicy Grilled Chicken

The one major complaint I have with chicken in the US is its sheer blandness. Even the Mexican joints, who manage to make the other meats nice and tasty, dish out some really plain chicken. I don’t usually have a problem with that, but my Indian tastebuds eventually get bored and crave for something with a bit more…punch. The saving grace is, that I’m a good enough cook, and I have a nice and big oven for roasting things in. So, it was time for me to don the proverbial chef’s hat and give it a shot.

Now the recipe here is one that has been honed over generation of cooks…nah, just kidding :D. I just tried it once based on approximate taste and estimates, and it worked well. A couple of iterations and minor corrections later, I was left with what’s described below. Feel free to make any changes to the recipe as per your taste, and if you come up with something interesting, do let me know :).

Preparation time: 2 hours 30 minutes

Cooking time: 45 minutes

Ingredients:

  • Chicken: 500g, thighs or breast
  • Yogurt: 2 tbsp.
  • Ginger paste: 1 tsp.
  • Garlic paste: 2 tsp.
  • Meat/Chicken masala: 1 tsp.
  • Garam masala: 1/2 tsp.
  • Pepper: 1 tsp. freshly ground
  • Red chili powder: 1/2 tsp.. Adjust this based on your taste, and your chili.
  • Salt: to taste. I used around 1/2 tsp.

Method:

  1. Wash and clean chicken. Cut slits in the bigger pieces and keep them aside.
  2. Mix all the ingredients except the chicken together to prepare the marinade.
  3. Apply the marinade generously over the chicken. Cover the chicken with a lid, and let it marinate for at least 2 hours.
  4. Preheat the oven to 350°F/180°C.
  5. In a baking tray, lay the chicken pieces leaving enough space for everything to cook properly.
  6. Cook the chicken for around 45 minutes, till the juices run clear.

Ta-da! The chicken is ready. Enjoy!
IMG_7551

Double Chocolate Chip Muffins: The Baking Adventures Continue…

It’s been so long since the last post that I forgot the password to my account. It’s been crazy. The semester started off easy enough, but then projects, assignments, labs…..phew! But, finally, my exams are done and dusted, the semester is up, and I’m free (for a month, then it’s back to the grind 😦 ). But a busy semester did not stop me from cooking something special every now and then. Over the next few days, we shall relive the culinary journey that was my first semester.

One of the major accomplishments this semester brought about was my growing confidence in baking. I baked a couple of cakes, and then I thought I was ready for the next big (or rather, small) step. I decided to go for muffins. But continuing with the theme of go big or go home, I went for chocolate chip muffins, and took that further up one notch by making them double chocolate. I mean, if I was going to fail, I’d rather fail making something spectacular. Anyway, the plan worked, and the muffins came out outstandingly amazing. So, here’s the recipe. Enjoy!

Preparation time: 30 minutes

Cooking time: 20 minutes

Ingredients:

  • All purpose flour/maida: 1 2/3 cup
  • Unsweetened cocoa powder: 1/3 cup
  • Sugar: 1 cup
  • Eggs: 3
  • Butter: 3 tbsp.
  • Oil: 1/2 cup
  • Milk: 1 tbsp.
  • Vanilla essence: 1 tsp.
  • Baking powder: 1 level tsp.
  • Baking soda: 1/2 level tsp.
  • Salt: 1 pinch
  • Chocolate chips: 2/3 cup

Method:

  1. Sift together the flour, cocoa powder and salt.
  2. Mix together the oil, butter and sugar.
  3. Beat the eggs till fluffy.
  4. Set the oven to preheat at 350 F/180 C.
  5. Add the flour mix and eggs slowly to the sugar and oil and mix well to remove any clumps.
  6. Once the lumps are gone, add milk to get a good ribbon consistency. You can adjust the quantity as per your batter.
  7. Mix in the vanilla essence, baking soda, baking powder and chocolate chips.
  8. Line a muffin tray with paper cups. Add batter to the cups till they are around 3/4th full.
  9. Sprinkle some chocolate chips on top of each muffin and lightly press them into the batter with your choice of equipment (a spoon in my case)
  10. Bake the muffins at 350 F/ 180 C for around 20 minutes or till a fork stuck into the centre comes out clean.

Ta-da! Muffins are ready! Add some frosting and sprinkles if you like, or just have them plain.

IMG_7782

Lemon Cakes: My First Foray into Serious Baking

I’m back (again), and this time I’ve got some big news. I’ve moved to Tempe, AZ, and am starting my Grad school. Yes peeps, I’m back to being a student now. So in the weeks leading up to the move, I asked my sister to teach me how to bake a cake. She’s an awesome baker, and I’m sure can bake a cake blindfolded. She suggested making a lemon cake, I just wanted a cake, any cake, so lemon cake it was. And yes, the Sansa reference wasn’t lost here. If you haven’t read A Song of Ice and Fire, or watched Game of Thrones, that reference wasn’t for you (and seriously, what’s wrong with you, why haven’t you done either of those two things?).

Note that this recipe is not a run of the mill cake recipe. I mean it’s still a cake recipe, but the ratios and quantities have been adjusted after trial and error. A tip I was given was, to increase the quantity of cake, multiply the entire recipe by an integer. Don’t increase 2 cups of flour to 3, because 4 and a half eggs are a little hard to find. Go to 4 cups and 6 eggs. Also, the baking time will depend on the quantity. The cooking time given here will increase if you’re making a bigger cake. 

Preparation time: 20 minutes

Cooking time: 30 minutes

Ingredients:

  • All purpose flour/maida: 1 3/4 cups. Yeah, the quantity above was just for illustration. Sorry about that.
  • Sugar: 1 cup
  • Eggs: 3
  • Lemon juice: 1/6 cup. You will need to adjust this as per your lemon. This quantity is for a relatively strong lemon.
  • Lemon extract: 1 tsp.
  • Lemon yellow color: 1/2 tsp.
  • Vanilla essence: 5-6 drops
  • Baking powder: 1 level tsp.
  • Baking soda: 1/2 level tsp.
  • Salt: 1/4 tsp.
  • Oil: 1/2 cup
  • Butter: 2 tbsp.

Method:

  1. Sift together flour and salt
  2. Melt butter, mix with oil and sugar
  3. Beat the eggs
  4. In a mixing bowl, mix the oil sugar mix with the flour and eggs. The method I was taught was to keep the entire oil sugar mix together, then add a little flour, then a little egg, and then mix. Repeat the above till all the flour and eggs are mixed with the oil and sugar.
  5. Set the oven to preheat at 180 C/350 F.
  6. Add lemon juice, extract, color and vanilla essence to the batter. Mix everything well and check consistency. It should flow in a single ribbon. If the batter is too thick, add a little milk. If it is too runny (which is mostly going to be the case), add a little flour.
  7. Once you have ribbon consistency, add baking powder and soda to the batter and mix well.
  8. Grease a baking tray well and pour the batter in.
  9. Once the oven is ready, put the cake in and bake at 180 C/350 F for approx. 30 minutes.
  10. Start checking from around the 25 minute mark to see if the cake is done. Stick a knitting needle or a fork in the center of the cake and see if something sticks. If it comes out clean, the cake is done.

Ta-da! You have a hot lemon cake at hand. Enjoy!


IMG_7085


IMG_7086

Tangdi Murg: The Spicy Indian Chicken Legs

Two months have passed since I last published a post, and there’s a very good reason for that. I’m moving to Tempe, Arizona, and have been busy with the formalities. Still I managed to find some time to cook, and I decided, chicken was the way to go.

Everyone has their favourite chicken piece. Some people like the wings, some like the breast, some people are fond of certain organs. I’m a big fan of the legs. Mostly because they are the most convenient pieces to hold and gnaw at. So I got some chicken legs.

The next part was deciding on the gravy. I personally prefer more of an onion-garlic-garam masala kind of gravy for chicken. Here’s what I did.

Preparation time: 60 minutes

Cooking time: 40 minutes

Ingredients:

  • Chicken legs: 1 lb. (you can use any other chicken cut with bones)
  • Onions: 2, medium. Pureed.
  • Ginger: 1/2″ piece
  • Garlic: 10-15 cloves
  • Garam masala: 1 tsp.
  • Coriander/Dhania powder: 1 tsp.
  • Cumin/Jeera powder: 1/2 tsp.
  • Red chili: 2
  • Red chili powder: to taste
  • Black pepper: 2 tsp., freshly ground
  • Bay leaf/Tejpatta: 1
  • Cumin seeds/jeera: 1/2 tsp.
  • Turmeric: 1/2 tsp.
  • Curd: 1 tbsp., whippped
  • Salt: to taste. I used around 1 1/2 tsp.
  • Oil: 2 tbsp.
  • Water: 1/2 cup

Method:

  1. In a bowl, mix curd, turmeric and some salt. Mix this with the raw chicken and set aside for an hour to marinate.
  2. In a pan, heat oil. Add cumin seeds and bay leaf and let the cumin crackle.
  3. Grind together ginger, garlic, red chili and pepper. Add this paste to the pan and cook for a few seconds.
  4. Add the onion puree to the pan and cook till the onions are well done.
  5. Add garam masala, cumina dn coriander powders to the pan along with a tablespoon of water. Let the spices cook well.
  6. Once the spices are done, add the chicken pieces, salt and red chili powder to the pan and cook on high heat for a couple of minutes.
  7. Add some water to the pan, cover with a lid and cook for a few minutes till the chicken is well done.
  8. If you need more gravy, add some water and let it boil for a few seconds.
  9. Let the cooked chicken stand covered for 5 minutes or so before serving.

Ta-da! Tangdi chicken is ready! Enjoy it with some delicious jeera rice or lachchha parathas.

Image

The Lachcha Paratha Project

There are some dishes that go solo, some need a Chewy (sorry 😀 ). Some need a sidekick that’s worthy, one that deserves to be there. Mom’s chicken curry, for example. You can’t have it with just another roti, or even a paratha. That curry needs a kick-ass lachcha paratha to go with it.

I’ve always had a soft spot for lachcha parathas. I love the crispy, layered structure. I love the fact that it manages to enhance the taste of any rich spicy gravy. But making one is no mean feat. That layered structure is the result of several rounds of rolling. In this post, I have tried the basic lachcha paratha. It was a messy effort, thanks to the fact that I had to stop to take photos after every step, and my camera’s grip needed a thorough cleaning after 😀 . Still, I think I’ve managed to grab all the details, so let’s start.

Preparation time: 30 minutes

Cooking time: 15 minutes per paratha

Ingredients:

  • Whole wheat flour/atta: 1 cup
  • Salt: 1 tsp.
  • Oil: 1 tbsp. for the dough, extra for cooking
  • Chat masala: 1 tsp.
  • Water: as required

Method:

The Dough:

  1. Sift the flour along with the salt. Add the oil and mix.
  2. Add water and knead a somewhat stiff dough. It should be stiff enough to not stick to your fingers.

Image

The Paratha:

  1. Make a small 2″ ball out of the dough. Roll out a moderately thick sheet out of it.
  2. Spread some oil and sprinkle some chat masala on one side.Image
  3. Roll the sheet up into a tight roll.Image
  4. Lightly flatten one side of the roll and spread some oil and chat masala on it. Image
  5. Roll the roll up into a disk shape. Image
  6. Now roll this disk out into a paratha. Image
  7. In a pan, cook the paratha dry till you can see brown spots. Flip it and cook the other side to the same level.
  8. Now pour some oil in, and cook both sides well until crispy.Image


Ta-da! Lachchha parathas are ready to roll (out)!

IMG_6591

Chicken Pathiya: The Tangy, Sweet and Spicy Curry

Sometime last year, Hyderabad hosted a street food festival. Over a hundred different varieties of dishes were available, a lot of them quite unique and delicious. One that particularly caught my attention was called Haji Chicken Pathiya. It was prepared by a very friendly old man from Delhi, who served it with fresh rumali rotis. It was a very unique dish, something I had never even heard of before. But, it was so tasty, I decided I needed more of that in my life.

This was the one time that Google let me down. It was too rare a dish to be even listed on most cooking sites. Even today, if you search for “chicken pathiya”, it will lead you to my Flickr photostream. I found some recipes by that name, but they weren’t really what I was looking for. I looked, and I looked. I tried different spellings, even went to page 2 of Google search results, and finally found one blog discussing the correct dish. That was something to go on. That and the single memory of that taste that I had. And as is often the case, I am happy to report, it was a blazing success. Now the amounts of vinegar, salt, sugar and red chili mentioned here are as per my taste. You can adjust as per your choice.

So, here is the recipe.

Preparation time : 30 minutes

Cooking time: 60 minutes

Ingredients:

  • Chicken: 400g, boneless, cubed
  • Onion: 1 big, pureed
  • Tomatoes: 3 medium, pureed
  • Ginger: 1/2″ piece
  • Garlic: 12-15 cloves
  • Jeera/Cumin seed powder: 1 tsp.
  • Dhania/Coriander powder: 1 tbsp.
  • Pepper: 2 tsp., freshly ground
  • Turmeric powder: 1/2 tsp.
  • Red chili powder: 2 tsp.. This needs to be adjusted as per your taste, and your chili.
  • Vinegar: 1 tbsp.
  • Sugar: 2 tsp.
  • Salt: to taste. I used around 1 1/2 tsp.
  • Chicken stock: 2 cups
  • Oil: 2 tbsp.

Method:

  1. In a pan, heat oil.
  2. Grind together the ginger and garlic, and add to the hot oil. cook for a few seconds.
  3. Add the onion paste to the pan and cook till golden brown.
  4. Add the spices (cumin, coriander, turmeric, pepper and red chili powders) to the pan and cook till fragrant.
  5. Add the pureed tomatoes and salt, and mix well. Cover with a lid and cook on low flame for 10-15 minutes.
  6. Once the tomatoes are done, add the vinegar, chicken stock and sugar, and mix well. If the gravy seems too runny at this stage, boil off the excess water.
  7. Add the cleaned chicken pieces, mix well, cover with a lid and cook on low heat for 5 minutes or till the chicken is done.

Ta-da! Chicken Pathiya is ready! Serve it with rice or rotis. I would suggest getting some rumali rotis to enjoy with this dish.

Image

Image

Mushroom Dimsums: An experiment gone very, very right

I like dimsums. There’s something really addictive about the plain, simple and unassuming nature of their taste, yet I’ve had enough varieties to know full well that they can be absolutely mindblowing. But, my penchant is a bit of an issue, since I’m seriously limited by my kitchen space, and that means I can’t keep a dedicated steamer. Which means I have to improvise. And boy do I improvise when it comes to cooking dimsums.

But before we come to cooking dimsums, there’s the question of the stuffing. The stuffing can be pretty much anything, from vegetables to water chestnuts to chicken to prawns to whatnot. On this very day, I had a packet of mushrooms that needed attending to (basically, I bought it, and then forgot about it till it was almost too late). So I decided to get creative with the stuffing, and came up with my own recipe. I did hit a roadblock, when I discovered I had run out of green chili sauce. But, the red chili sauce I substituted it with turned out to be an even better fit. 

So, here’s the recipe:

Preparation time: 30 minutes

Cooking time: 60 minutes

Ingredients:

For the stuffing

  •  Mushrooms: 200 g, diced
  • Garlic: 8-10 cloves, crushed and chopped fine
  • Dark soya sauce: 3-4 tsp.
  • Red chili sauce: 3-4 tsp.
  • Vinegar: 1 tsp.
  • Salt: to taste. I used around 2 pinches, but you may not need it because of the soya sauce
  • Pepper: 1 tsp., freshly gound
  • Oil: 1 tbsp.

For the shell

  • Maida/refined flour: 1 cup
  • Oil: 1 tsp.
  • Salt: 1/2 tsp.
  • Water: to bind


Method:

Stage 1: The stuffing

  1. In a pan, heat oil
  2. Add the garlic and let it cook for a few seconds. Do not let it burn.
  3. Add the mushrooms, a pinch of salt and pepper. Cover and cook for a minute.
  4. Once the mushrooms start sweating, add the sauces and vinegar. The amounts given are indicative, so please adjust as per your liking. Ideally, it should taste somewhat hot, with a clear taste of soya. The vinegar should not be very apparent. It’s there to fill a hole in the taste and make it more well rounded.
  5. Add more salt if required, cook till the mushrooms are well done.

This is what the stuffing looks like:

Image


Stage 2: The dough

  • Mix the maida, salt and oil together. Add water and knead a stiff dough.

Stage 3: The dumplings

  1. Take a small 1/2″ ball of the dough and roll it out into a thin sheet. The sheet should be thin enough to show the colour of the board underneath.
  2. Take some stuffing and put it on the sheet in the center. Then, fold the dumpling up into a shape that you like, or in my case, can manage :D. In case you can’t get it to close, use a thick paste of maida and water as an adhesive.
  3. Put the dumplings in your steaming arrangement and steam at medium heat for around 15 minutes till the shell is cooked.

Ta-da! The dumplings are ready.

The raw dumplings:

Image

The steaming arrangement with the “lid” on and off

ImageImage

The final product

Image


Gobhi Aloo Bhujia: The Universal Bhujia

My mom can make at least a dozen dishes with cauliflowers. Curries, sandwiches, pakoras, etc. One of my absolute favourites from the list though is the gobhi aloo bhujia she makes. It’s a plain and simple recipe which she usually makes for breakfast with parathas. But, I believe it goes equally well with pooris, kachoris or rice. In fact, I always save some of it to have with just rice. Also, this is the trademark bhujia almost any North-Indian carries during journeys because it’s tasty, yet doesn’t spoil easily thanks to the absence of onions, and it’s quick and easy to make as you’ll see soon.

Preparation time: 20 minutes

Cooking time: 30 minutes

Ingredients:

  • Cauliflower: 1 big, chopped fine
  • Potatoes: 3 medium, sliced (you can keep a different shape if you want, but I prefer it this way)
  • Red chili: 2. This depends on your taste and the chili.
  • Jeera/Cumin seeds: 2 tsp.
  • Ginger: 1/2″ piece
  • Garlic: 5-6 cloves
  • Turmeric: 1/2 tsp.
  • Pepper: 1 tsp., freshly ground
  • Salt: to taste. I used around 2 tsp.
  • Oil: 2 tbsp.

Method:

  1. In a pan, heat oil.
  2. Add red chili and cumin seeds. Let the seeds crackle.
  3. Grind together/chop fine the ginger and garlic and add to the pan. Cook for a few seconds till ginger and garlic are cooked.
  4. Add cauliflower, potatoes, salt, turmeric and pepper,
  5. Mix everything well, cover with a lid and cook on low-medium heat till the cauliflowers and the potatoes are done.

Ta-da! Wasn’t that simple? 

Image

On a separate note, Happy Birthday dad 🙂 

Brinjal with Peanut Powder

I’m the kind of person who likes food irrespective of its origins. I know a lot of people who call themselves foodies, but their choices are limited to certain cuisines. Not so with me. I love to try dishes from different regions, both inside and outside India.

One of my several South Indian favourites has always been brinjal with roasted peanut powder. I had my first taste of it as a kid in a friend’s lunchbox. This was, unfortunately, one of the rare few dishes my mom didn’t know how to make. So I waited and waited…and kinda forgot about it. Then I came to Hyderabad. I started seeing the dish again, and this time, I decided to get the recipe from a colleague and decided to give it a go.

Preparation time: 30 minutes

Cooking time: 40 minutes

Ingredients:

  • Brinjals/eggplant/aubergine: 250 g, diced
  • Roasted peanuts: 1/4 cup
  • Onion: 1 small, chopped fine
  • Garlic: 8-10 cloves, crushed and sliced
  • Mustard seeds: 1 tsp.
  • Curry leaves: 8-10
  • Red chili powder: 1/2 tsp.. This depends on your taste, and your chili.
  • Salt: to taste. I used around 1 tsp.
  • Oil: 1 tbsp.

Method:

  1. Grind the peanuts to a rough powder and keep aside.
  2. In a pan heat oil.
  3. Add mustard seeds and let them crackle.
  4. Add curry leaves and garlic. Cook till the garlic is done, but don’t burn it.
  5. Add onions and cook till golden brown.
  6. Add the brinjals, chili powder and salt to the pan. Cover and cook for a few minutes till the brinjals start feeling soft.
  7. Add the peanut powder and mix well. Cook till the brinjals are well done.

Ta-da! We’re done. Enjoy with chapatis, dosa, rice, or anything else you like.

Image

Mushroom do Pyaza

I’m back!. It’s been a month since I wrote a post, but sometimes, there just isn’t enough time. Now I have some time, so here’s a new recipe for the new year.

My love for mushroom is no secret. I can have mushrooms boiled, fried, sauteed…chopped, sliced, diced, whole…as starter, main course, side dish(no sweets..I’m not sure that’s a great idea). One of the most popular Indian mushroom recipes is mushroom do pyaza. The do pyaza part signifies two types of onions, chopped and sliced. It’s easy, but very, very delicious. So here’s the recipe.

Preparation time: 20 minutes

Cooking time: 30 minutes

Ingredients:

  • Mushrooms: 200g, roughly chopped
  • Onions: i large chopped, 1 large sliced
  • Tomatoes: 1 medium, pureed
  • Ginger: 1/2 inch piece
  • Garlic: 3-4 cloves
  • Green chili: 1. This depends on your taste and chili.
  • Kitchen king masala: 2 tsp.
  • Turmeric powder: 1/4 tsp.
  • Pepper: 1/2 tsp., freshly ground
  • Jeera/Cumin seeds: 1/2 tsp.
  • Salt: to taste. I used around 1 1/2 tsp.
  • Oil: 2 tbsp.

Method:

  1. In a pan heat oil.
  2. Add jeera and let it crackle.
  3. Grind together ginger, garlic and chili. Add to the pan and cook for a few seconds.
  4. Add all the onions and cook till golden brown.
  5. Add the spice powders and  a bit of water. Let them cook for a few seconds, but be careful to avoid scorching.
  6. Add the tomato puree and cook.
  7. Once tomatoes are done, add the mushroom and stir well. Cover with a lid and cook on slow heat till the mushrooms start sweating. Beyond this point, it’s your call n how well you want the mushrooms done, and how much water you want to leave behind.

Ta-da! Mushroom do pyaza is ready. Serve with rotis, parathas or rice.

Image